


Let me begin by saying that this cake is geared towards amateur cake decorators like myself. Very few of us have mad baking skills to where we can make a cake look professional. Plus, many of us don’t have all those fancy tools that decorators use either. There’s no need to go out and spend loads of money getting those tools just for making a cake a couple of times a year. Further, there’s no need to spend $75 - $100 getting one made either because none of us have that cash either. However, what we do want is a simple cake we can make ourselves that doesn’t cost a ton of money and doesn’t look like a 3-year-old made it. So we put together a guide to show you how to make your own Olaf Pull Apart Cupcake Cake.

This Olaf Pull Apart Cupcake Cake can be made three ways: By using homemade cupcakes, store-bought cupcakes, or boxed cupcakes. You can also choose to use mini cupcakes or normal sized cupcakes. I used mini cupcakes that I made from a box for this cake and it cost less than $10 and only took about an hour, including the baking time for the cupcakes.


Ingredients for Olaf Cupcakes
Directions for Olaf Pull Apart Cupcake Cake
First, prepare the cake mix as directed by the box. Use cupcake liners to bake your cupcakes as this will be necessary for the shaping of the cake to go smoothly. Note that you will need around 28 cupcakes. Bake the mini cupcakes for ten minutes or until a toothpick comes out clean.


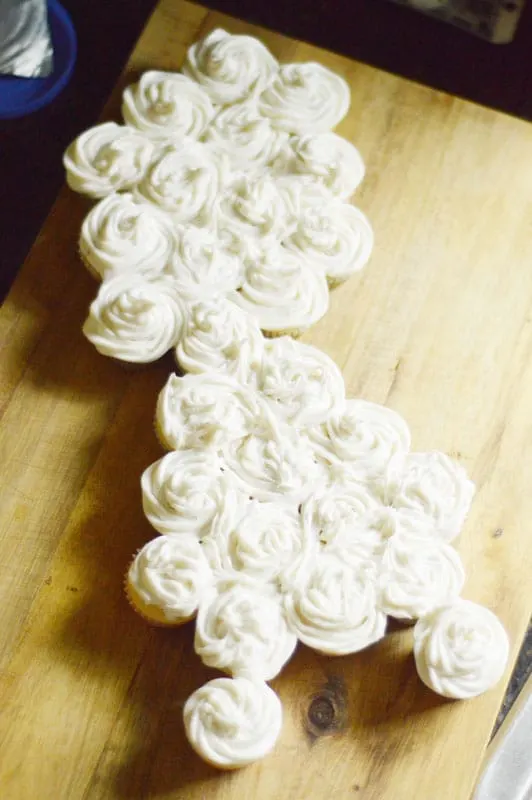
Allow the cupcakes to cool thoroughly and then shape them following the diagram below on top of something they can be transported on. A cookie sheet, a board, etc. Each X represents a single cupcake. The lower portion will need to sit more sideways which wasn't possible to show in this format.
X X
X X X
X X X X
X X X
X X
X X
X X X
X X X X
X X X
X X
Once your cupcakes are in place, using scissors, clip the corner of a baggie or frosting back off and use any tip you like to frost the cupcakes with the white frosting. Put the frosting tip in the corner of the bag, then place the frosting in behind it and squeeze it down. It’s ok if the cupcakes aren’t perfect, just be sure that all the cupcakes are connected by the frosting, which means no gaps without frosting in between the cupcakes.

Take one Oreo and separate it, placing the one half of the cookie partway down the lower half of the cake and the second half of the cookie goes just a little ways below that one.


Take your other two Oreos and separate them, setting the side without the frosting on it, to the side. Using your fingers, gently shape the frosting to be even on the Oreo and place those at the top of the cake, near the bottom of the first two cupcakes, be sure the two Oreo halves are centered.
Using your black frosting tube, dab some of the black frosting in the middle of each cookie to finish the eyes.


Then make what looks like an elongated U shape just a bit below the eyes with the black frosting and fill it in. This will be his mouth.
Lastly, use a bit of your white frosting you have left to make a rectangle at the top of his mouth which is his teeth.
Using the black frosting again, make the hair strands at the top and then make two long black strokes right around the top of the bottom portion of the cake for the arms. I put a blob of black frosting at the top of each arm and used a toothpick or butter knife to spread it out and make the fingers.


For the nose, put a frosting tip that is plain with no design in a baggie just like step 3. Put orange frosting in this baggie, and make the nose by stacking the frosting. Do this by making the base of the nose and as it gets tall enough, lightly push your frosting tip down to pack it down and also make it look like little lines like the lines on the carrot of his nose. You’ll need to let it stack up and dab it down about 4 times or until the nose is tall enough or big enough.
Tips for Making Cupcake Cake
- Keep a butter knife handy along with toothpicks. If you accidentally get a color of frosting someplace it’s not supposed to be, you can easily remove it without it mixing in with one of these tools. I used my toothpick and butter knife to reshape and straighten things more than anything.
- If you go to make the teeth and they just don’t look right, there needs to be a very thin black line at the top of the teeth right before they start or it looks strange. It took me forever to figure this one out.
- The teeth need to be longer at the top and not long on the bottom if that makes sense. It needs to resemble a stick of gum, only shorter.
- If you’re unsure of how to do the nose, try it on a napkin first. They sell orange frosting in a container for around $1 or a little more. This gives you plenty of cheap frosting to practice with if you need it.
- You’ll want to use a fatter tip for the nose. In other words, not one of the tiny tips, but a step up from that. The frosting tips they sell at Walmart are cheap and should contain both sizes.
- If you make this cake with the larger cupcakes and not mini cupcakes, you’ll need to add one more Oreo button down the front of the cake. Also, you’ll still use the same amount of cupcakes.
- Do note that if you use store-bought cupcakes for this, they may not stick together appropriately and it will be more expensive than the other two options. Although it is definitely quicker and much easier to assemble in a pinch while still saving money.


I have been visiting the parks annually since my parents first brought me at just a year old. Recently I was able to fulfill my life long dream of being a Florida local and moved from the wintery Northeast to the sunshine and fun of central Florida. Now I am hoping to share my Disney knowledge with you so you can have the best vacation possible!


